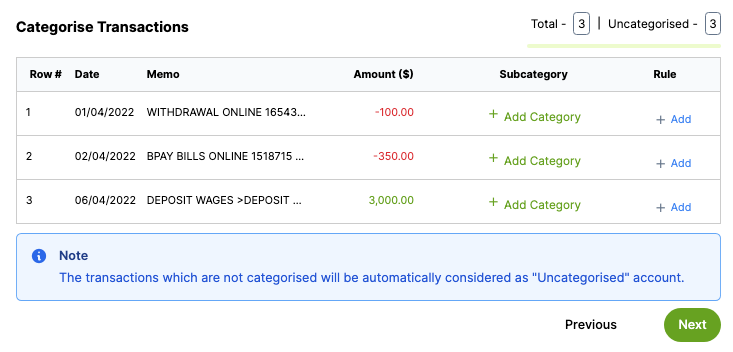
By default, all transactions are listed as Uncategorised. Categorisation can be set up within rules or added manually to individual transactions.
Rules can be set up to make importing transactions quicker by automating the classification of subcategories according to chosen values. Using rules is especially useful if you have a large number of transactions to import.
Select +Add to create a transaction rule.
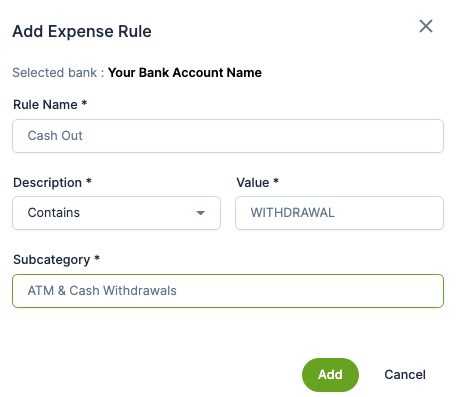
Using transaction rules, you can automate the categorisation of the transactions. Transaction rules in the banking module helps you identify and search bank transactions based on your criteria.
A rule cannot be added to a transaction which does not have a description. Rules are added as either income or expense rules and allow Hubex to automatically apply a subcategory according to the Description and Value chosen.
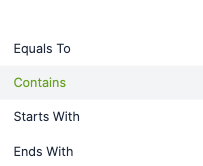
The Description drop down menu allows you to choose several options according to the most appropriate criteria for your rule.
Enter the relevant information in the Value field to allow the rule to find all transactions that meet the set criteria. To make the rule more constrained, choose the Description drop-down Equals To.
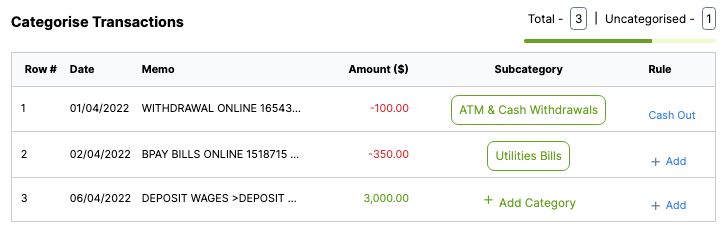
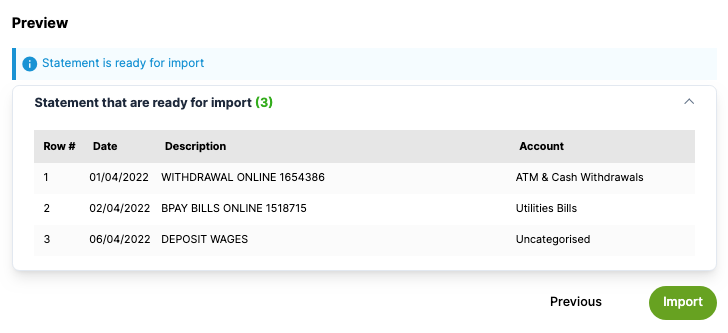
Once the rules have been set for the transactions, review the transactions before proceeding.
You can also manually select subcategories at this point if you want to allocate a transaction to a subcategory without creating a rule, by selecting + Add Category. Select from the Hubex list or add your own subcategory.
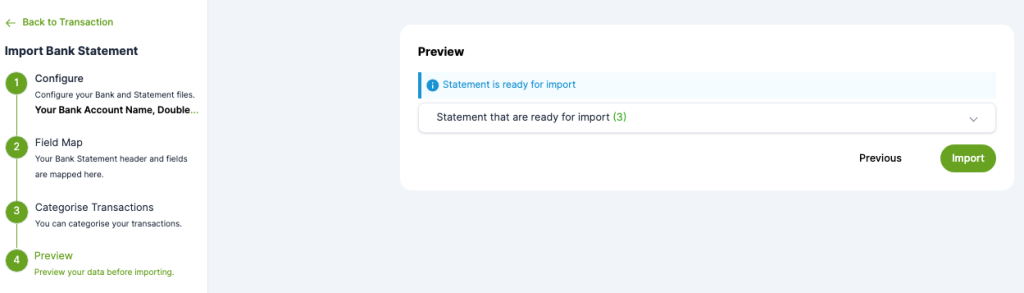
Select Next to proceed. Check the transactions listed in the Preview screen.
If any transaction shows an error, select the Previous button to make amendments to individual transactions.
Alternatively, if you need to make corrections to the CSV file to be imported, select Back to Transaction at the top left of the screen to start the import process again.
Make amendments in the CSV import file as required, and repeat the Import process.
Once the CSV file is ready for importing, select the Import button and the file will be imported into the transaction list.
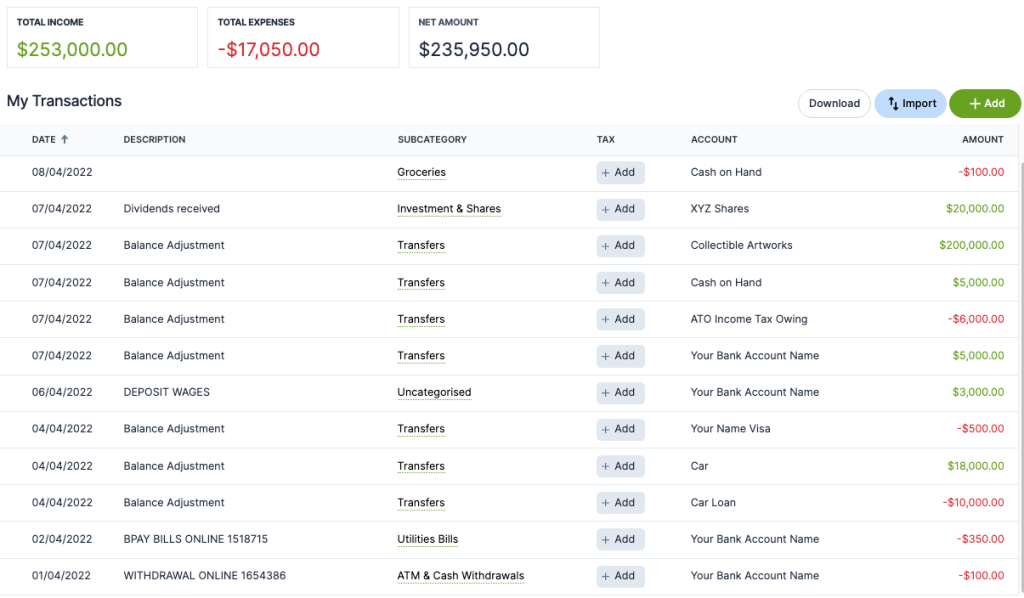
You will now see the imported transactions have been added to the My Transactions list and the totals included in the My Money widgets.